So at the request of a member of the Spelunky forums, I wrote up a tutorial on modding Spelunky and posted it there. It’s based off a blog post I did back in September, but has a lot more detail about actually modifying it. It ended up taking me about an hour to write, and it seems like the kind of thing I’d want to see indexed by search engines (which suck at indexing forums), so I’m putting it here for posterity.
Overview
This tutorial will teach you how to mod Spelunky so that its level generator creates a ridiculous number of spikes, mostly in places that make sense!
The high-level view of how Spelunky generates levels is that each level is divided into a 4×4 grid of 16 rooms. Each room consists of 80 tiles, 10 tiles wide and 8 tiles high. In the source code, rooms are structured as 80-character strings. Here’s an example:
“00000000110060000L040000000P110000000L110000000L11000000001100000000111112222111″
If we add line breaks every ten characters to create our 10×8 room, we can begin to see the way rooms are laid out:
0000000011
0060000L04
0000000P11
0000000L11
0000000L11
0000000011
0000000011
1112222111
The game does some neat stuff in terms of figuring out how to create a path through the level and make sure there’s a way through every time, but I’m not going to discuss that in this post.
How Basic Rooms Are Generated
There are 4 basic room generation scripts, one for each area of the game.
- scrRoomGen: basic cave
- scrRoomGen2: jungle
- scrRoomGen3: yeti
- scrRoomGen4: temple
I’m going to focus on scrRoomGen, which generates rooms for the first four levels of the game.
A room layout generally contains walls, ladders, pushblocks, and obstacles. Let’s look at our first example:
0000000011
0000000L04
0000000P11
0000000L11
5000000L11
0000000011
0000000011
1112222111
“1″ means wall/floor, “2″ means there’s a 1 in 10 chance of a pushblock, otherwise it’s a brick, “L” means ladder, “P” means top platform of a ladder, “4″ means a 1in 4 chance of a pushblock, otherwise it’s empty. “5″ is special and I’ll explain it in a bit. This is an example of a room where there’s a solid floor of bricks and maybe pushblocks, there’s a wall to right with a ladder going up to the top, and there might be a pushblock at the top of the wall where it blocks you from getting to the other side. (Note: svenski posted a partial guide to these symbols that might come in handy.)
How Obstacles Get Added
“5″ is our special case here. It’s an obstacle. An obstacle is a 5×3 block of tiles which gets overlaid onto the map wherever there’s a 5 (in this case). 5 is used to signify ground obstacles, like spikes, so this is the one we care about.
If we go to line 265 in the scrRoomGen script, we see this:
else if (tile == "5") // ground
 {
 switch(rand(1,16))
 {
 case 1: { strObs1 = "11111"; strObs2 = "00000"; strObs3 = "00000"; break; }
 case 2: { strObs1 = "00000"; strObs2 = "11110"; strObs3 = "00000"; break; }
 case 3: { strObs1 = "00000"; strObs2 = "01111"; strObs3 = "00000"; break; }
 case 4: { strObs1 = "00000"; strObs2 = "00000"; strObs3 = "11111"; break; }
 case 5: { strObs1 = "00000"; strObs2 = "20200"; strObs3 = "17177"; break; }
 case 6: { strObs1 = "00000"; strObs2 = "02020"; strObs3 = "71717"; break; }
 case 7: { strObs1 = "00000"; strObs2 = "00202"; strObs3 = "77171"; break; }
 case 8: { strObs1 = "00000"; strObs2 = "22200"; strObs3 = "11100"; break; }
 case 9: { strObs1 = "00000"; strObs2 = "02220"; strObs3 = "01110"; break; }
 case 10: { strObs1 = "00000"; strObs2 = "00222"; strObs3 = "00111"; break; }
 case 11: { strObs1 = "11100"; strObs2 = "22200"; strObs3 = "00000"; break; }
 case 12: { strObs1 = "01110"; strObs2 = "02220"; strObs3 = "00000"; break; }
 case 13: { strObs1 = "00111"; strObs2 = "00222"; strObs3 = "00000"; break; }
 case 14: { strObs1 = "00000"; strObs2 = "02220"; strObs3 = "21112"; break; }
 case 15: { strObs1 = "00000"; strObs2 = "20100"; strObs3 = "77117"; break; }
 case 16: { strObs1 = "00000"; strObs2 = "00102"; strObs3 = "71177"; break; }
 }
 }
What it does is this. After the game builds all the basic, and trap-free, rooms, it goes through every tile and checks if there’s an obstacle. (5, 6, and 8 count as obstacles for the first four levels of the game.) If it hits a 5, it runs the above code. It then picks one of the 16 possible 5×3 obstacle setups at random. Let’s assume it picked number 6.
If we take case number 6 and “stack” the different strings with strObs1 on top and strObs3 on the bottom, we get this:
00000
02020
71717
What that means is this:
- The top row of tiles won’t modify the tiles they’re on top of. So if the 5 in our room had a 1 next to it, that 1 would stay a 1 (probably solid ground) no matter what.
- The second row has two tiles in it that have a 1 in 2 chance of being a brick (with a small chance of being a pushblock)
- The third row goes like this: spike-block-spike-block-spike (a 7 means spike)
It’s not *exactly* that, though. Spelunky loves to pile randomization upon randomization. If we look down in the code a little bit, we see this:
else if (tile == "7" and rand(1,3) == 1) instance_create(xpos, ypos, oSpikes);
Turns out there’s only a 1 in 3 chance of a spike appearing whenever there’s a 7!
Finally, Adding Some Spikes!
So the first thing we can do is increase the chances of spikes appearing. Let’s go totally crazy and make it a 1 in 1 chance: that is, whenever there’s a 7, there’s a spike. What happens?
else if (tile == "7" and rand(1,1) == 1) instance_create(xpos, ypos, oSpikes);
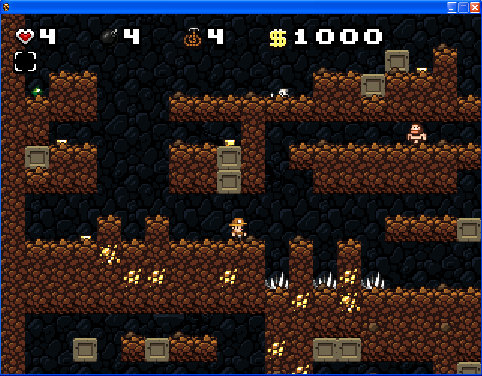
Hmm, it’s definitely spikier than usual but not what I would call ridiculously spikey. The reason for this is that if we look at the 16 different cases up above, only about half of them have any spikes at all! So even when a “7″ means “definitely put a spike here,” it’s not going to help us when there are no 7′s at all! So let’s modify things a little!
We’ll add a crapload more 7′s to the strObs3 of each of the 16 cases. (The reason we only do it to strObs3 is that it’s the one that’s always going to be on the ground. Otherwise we end up with floating spikes.)
else if (tile == "5") // ground
 {
 switch(rand(1,16))
 {
 case 1: { strObs1 = "11111"; strObs2 = "00000"; strObs3 = "77707"; break; }
 case 2: { strObs1 = "00000"; strObs2 = "11110"; strObs3 = "07770"; break; }
 case 3: { strObs1 = "00000"; strObs2 = "01111"; strObs3 = "70707"; break; }
 case 4: { strObs1 = "00000"; strObs2 = "00000"; strObs3 = "11111"; break; }
 case 5: { strObs1 = "00000"; strObs2 = "20200"; strObs3 = "17177"; break; }
 case 6: { strObs1 = "00000"; strObs2 = "02020"; strObs3 = "71717"; break; }
 case 7: { strObs1 = "00000"; strObs2 = "00202"; strObs3 = "77171"; break; }
 case 8: { strObs1 = "00000"; strObs2 = "22200"; strObs3 = "11177"; break; }
 case 9: { strObs1 = "00000"; strObs2 = "02220"; strObs3 = "71110"; break; }
 case 10: { strObs1 = "00000"; strObs2 = "00222"; strObs3 = "77111"; break; }
 case 11: { strObs1 = "11100"; strObs2 = "22200"; strObs3 = "77007"; break; }
 case 12: { strObs1 = "01110"; strObs2 = "02220"; strObs3 = "70077"; break; }
 case 13: { strObs1 = "00111"; strObs2 = "00222"; strObs3 = "77777"; break; }
 case 14: { strObs1 = "00000"; strObs2 = "02220"; strObs3 = "21112"; break; }
 case 15: { strObs1 = "00000"; strObs2 = "20100"; strObs3 = "77117"; break; }
 case 16: { strObs1 = "00000"; strObs2 = "00102"; strObs3 = "71177"; break; }
 }
 }
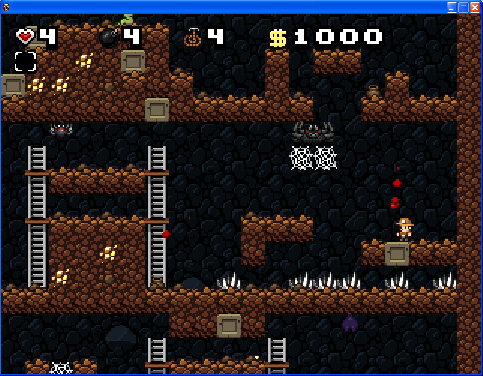
Hmm, pretty good but still not quite there. The reason we’re STILL not seeing a lot of spikes is because it only goes through those 16 cases if it runs happens to run into a 5 tile! For example, the room you see in the above picture, in the center-left, just didn’t have a 5 tile so there are no spikes.
The Hard Part
This is where the modding gets hard. You’re going to need to go through each one of the 80-character room strings (there are about 30 of them) and break them into their 8×10 blocks, figure out where you want to put an extra 5 tile, and then put them back together. For example, let’s go with this one:
“60000600000000000000000600000000000000000000000000000222220000111111001111111111″
We break it out into 8 rows of 10:
6000060000
0000000000
0006000000
0000000000
0000000000
0002222200
0011111100
1111111111
Hey, it looks like a pretty empty room. Let’s add a 5. Since the 5 is a 5×3 block of tiles, 3 blocks tall, we need to put the 5 somewhere in the fourth row from the bottom. Otherwise our spike tiles will be floating in air, or worse!
6000060000
0000000000
0006000000
0000000000
5000050000
0002222200
0011111100
1111111111
Which then becomes this:
“60000600000000000000000600000000000000005000050000000222220000111111001111111111″
I added two 5′s to the room. Combined with my super spikey obstacle set, this is probably going to have a lot of spikes in it!
I don’t have the time to go through and artfully place all these obstacles (this is where the art of level design comes in handy!), but as a quick hack I just added a crapton of 5′s in places that I was pretty sure ahead of time would *probably* be safe.
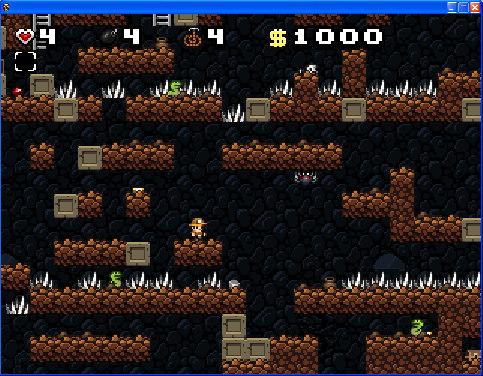
Now that’s what I call spikey! You can see from the screenshot that there are a few places where spikes are randomly hanging in mid-air. That’s why you need to do what I showed above, and for every room, painstakingly take it apart and replace the obstacle tiles where appropriate and stitch them back together. This is really hard, and this is one of the many reasons why Derek is a game design genius!
Anyway, if you want the source code that generated my super-spikey cave, you can find it here. Just replace scrRoomGen in the Spelunky source code with that script and you’ll be in spike city. (Be sure to back up your old script first!)

{ 1 comment }
Excellent, thanks for the analysis. I’m applying Spelunky’s pseudo-random level generation techniques to a prototype roguelike that I’m working on, using the Unity engine. Your description of the underlying code has been a great help. Thanks!
Comments on this entry are closed.
{ 3 trackbacks }